How to Attach Legs and a Base to a Live Edge Slab
A practical guide to mounting a live edge slab on legs or a base: choosing a style, sizing it, allowing for wood movement, installing threaded inserts, and leveling.
Quick answer: To attach legs or a base to a live edge slab, pick a base that suits the slab's size and use, then set it on the upside-down top with enough inset for knees and enough footprint to resist tipping. Flatten the underside where the base will sit, and fasten the top so it can move across the grain: slotted holes or a slotted rail for steel bases, figure-8 fasteners or Z-clips for wood aprons and trestles. Threaded inserts with machine bolts make the strongest, most removable connection. Drill with a depth stop so nothing comes through the top, center each fastener in its slot, snug the bolts without cranking them down, and level the finished piece at the feet.
A slab top gets most of the attention, but the base decides whether the finished piece stands solid, sits comfortably, and stays flat for years. The connection between the two matters as much as the base itself. A wide slab keeps swelling and shrinking across its width as indoor humidity changes, even after kiln drying, and a base that locks it in place gives that movement nowhere to go. The result is usually a crack, a cupped top, or fasteners that tear loose.
Which base style works best for a live edge slab?
Any common style can carry a slab; the choice depends on length, weight, seating, and looks.
- Steel U or square legs are rigid flat-bar or tube frames at each end, simple to mount and suited to tables, desks, and benches.
- Trapezoid and X legs splay wider at the floor, adding stability on longer tops.
- Hairpin legs are light and work well on coffee tables, side tables, and small desks, but can feel springy under a long, heavy slab.
- Trestle bases use two end supports joined by a stretcher, handling long slabs while leaving the corners free for seating.
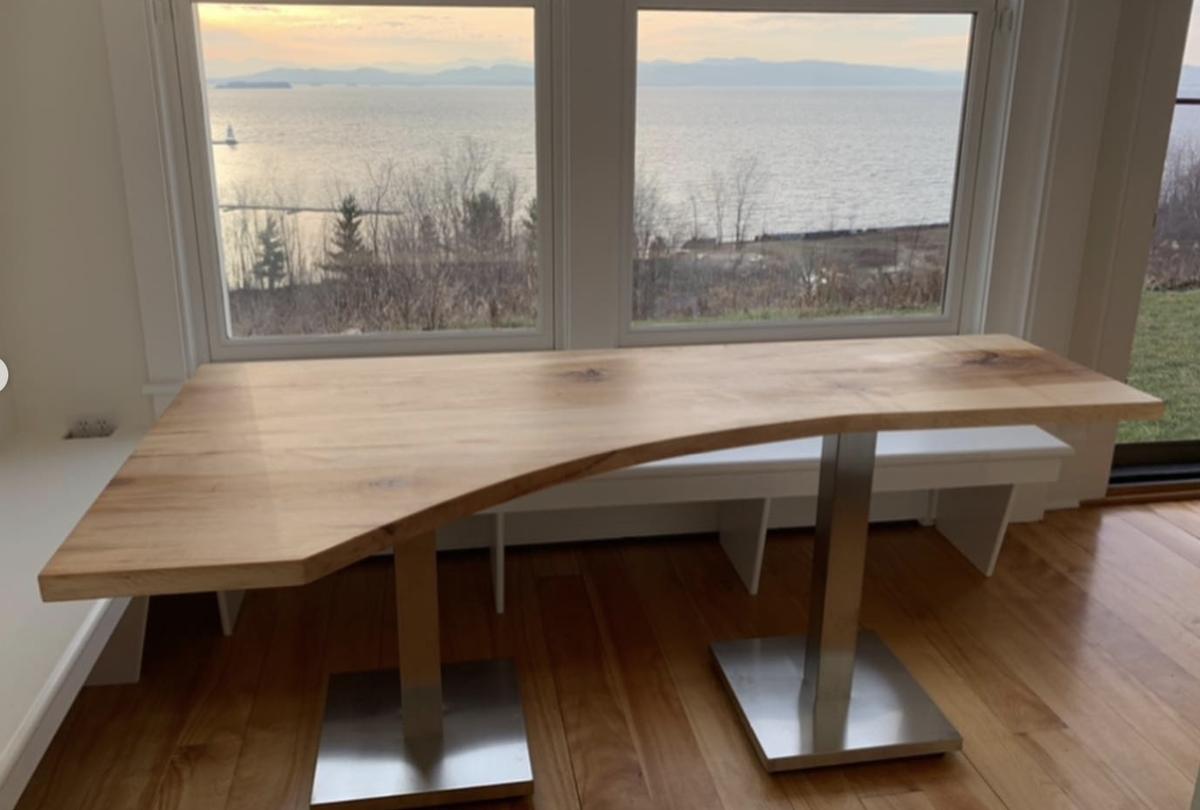
- Pedestal bases put one or two central columns on broad feet, leaving knee room all around.
- Wood legs and aprons are the traditional choice: a joined frame fastened to the top with clips.
A thick hardwood slab is heavy, so choose legs and hardware rated for the load.
How should you size a base to a slab?
Base sizing balances legroom against stability. Pull the supports in from the ends and seated people have room for their knees; push them out and the top resists tipping when someone leans on a corner. On dining tables and desks, end overhangs of around a foot are a common starting point. For width, most bases stop a few inches inside the narrowest part of the slab, so the frame stays hidden and nobody hits it with their shins.
A live edge complicates the math because the width changes along the length. Measure where each support will actually land, not at the widest point, and check that no corner of the base pokes past a narrow spot or a deep curve in the edge. Long overhangs on thin slabs can sag over time, so thinner tops need supports placed closer to the ends or a steel rail underneath to stiffen them. For project dimensions and seating, see our guide to choosing slab size.
How do you allow for seasonal wood movement?
Wood moves very little along its length, but it swells and shrinks noticeably across the grain as humidity changes. On a slab that is a couple of feet wide or more, that seasonal change can add up to a meaningful fraction of an inch.
Slotted holes and rails
Most steel bases and mounting rails come with slotted holes. The slots must run across the grain, parallel to the slab's width; slots that run lengthwise allow motion the wood never makes and block the motion it does. A common approach is to fix the top at the centerline and slot everything outboard of it, so movement splits evenly to each edge. A length of steel C-channel or flat bar across the underside, screwed or bolted through slots, also helps keep a wide slab from cupping.
Figure-8 fasteners and Z-clips
For wood bases with aprons or rails, figure-8 fasteners (desktop fasteners) sit in shallow round recesses drilled into the top edge of the apron. One end screws to the apron and the other to the top, and the fastener pivots slightly as the top moves. Z-clips, also called tabletop fasteners, hook into a saw kerf cut along the inside of the apron and screw to the underside of the top. They slide in the kerf as the wood swells and shrinks. Shop-made wooden buttons that fit a groove work the same way.
Whatever the hardware, never glue a slab to its base, and never drive a row of screws through round holes across the width. That is the fastest way to crack a top.
Threaded inserts or lag screws: which is better?
A threaded insert is a steel or brass sleeve with coarse outer threads that bite into the wood and machine threads inside for a bolt. Inserts hold far better than screws and let the base come off and go back on for moving, refinishing, or freight shipping. Common sizes for table bases are 1/4-20 and 5/16-18, and the insert's instructions give the correct pilot hole size.
Lag screws are faster and fine for small, light pieces, but they loosen each time they come out and can split the wood if overdriven. For a dining slab, a desk, or anything that may be disassembled, inserts are worth the extra few minutes per hole.
What tools and materials do you need?
- The base or legs, plus any mounting rails or C-channel
- Threaded inserts and matching machine bolts with flat washers, or figure-8 fasteners and Z-clips with short wood screws
- A drill, brad-point bits, a stop collar or tape flag, a countersink, and a hex key
- A tape measure, square, awl, and moving blankets or padded sawhorses
- A random-orbit sander or hand plane for flattening mounting spots
- Adjustable feet or glides, and a level
How do you attach a base to a live edge slab, step by step?
- Finish the slab first. Seal the underside along with the top, since an unfinished bottom face absorbs and releases moisture faster than the top and can cause cupping. Our guide to caring for and finishing live edge slabs covers products and schedules.
- Flip the slab onto a padded surface. Lay it face down on blankets or padded horses.
- Mark the grain direction. Draw an arrow along the length of the underside.
- Position the base. Measure overhang from both ends and edges, and check that the supports land on solid wood rather than over a crack, void, or epoxy fill.
- Flatten the mounting areas. Sand or plane any high spot so each mounting plate sits fully on the wood instead of rocking.
- Mark the holes. Mark through each hole with an awl, centering the mark in the slot so the bolt can travel equally in both directions.
- Drill to a set depth. Measure the slab's thickness at each hole, since it varies. Set the stop collar to the insert's length plus a little extra, and keep plenty of solid wood between the bottom of the hole and the top surface. Drill square to the surface and clear the chips.
- Install the inserts. Countersink each hole lightly to prevent tear-out, then drive the inserts straight and flush with a hex key. A drop of epoxy or glue in softer woods adds holding power.
- Bolt on the base. Start every bolt by hand with a washer, then tighten until the plate is snug. On slotted holes, stop short of clamping hard so the washer can slide as the top moves.
- Set it upright and level. With a helper, turn the piece over and adjust the feet until it stops rocking. Recheck the bolts after a season of humidity changes.
What mistakes should you avoid?
- Orienting slots along the length of the slab instead of across the width
- Gluing the base to the top or screwing it through tight round holes
- Drilling deeper than the slab allows and coming through the show face
- Mounting plates over a hump on an unflattened underside
- Overhanging a thin slab too far, or using light legs under a heavy top
- Leaving the underside unfinished
- Placing inserts off-center in their slots, which removes room for movement
Browse kiln-dried slabs in the shop, or come see the wood in person at the yard in Sharon, VT. We also ship freight to the contiguous 48 states; the shipping page explains how. If the slab still needs prep before the base goes on, start with flattening with a router sled and stabilizing cracks with butterfly keys.
FAQ: attaching legs and bases to live edge slabs
How do you attach a live edge slab to a metal base?
Set the base on the upside-down slab, mark through the mounting holes, drill to a set depth, and install threaded inserts. Bolt the base on with washers, using slotted holes that run across the grain so the top can move.
Do you need threaded inserts for table legs?
Not always, but they are the best choice for most slab tables. Inserts hold better than wood screws, resist stripping, and let the base come off and go back on for moving, refinishing, or shipping.
Which way should the slots run on a table base?
Across the grain, parallel to the slab's width. Wood moves very little along its length, so slots that run lengthwise do nothing to relieve seasonal swelling and shrinking.
Can you screw legs directly into a live edge slab?
Small, light pieces can get by with wood screws in slotted holes. On larger tops, screws through tight round holes or across the width restrain movement and can crack the slab, and they wear out each time they are removed.
How deep should you drill for threaded inserts?
Slightly deeper than the insert is long, while leaving plenty of solid wood above the hole. Measure the slab's thickness at each location, since it varies, and use a stop collar or tape flag on the bit.
How much overhang should a slab have past its base?
Around a foot at the ends is a common starting point for dining tables and desks. Thin slabs need less overhang or a stiffening rail, and the base should stay a few inches inside the narrowest part of the live edge.
Should you glue a slab to its base?
No. Glue locks the top in place, and as the wood swells and shrinks across its width the joint will fail or the slab will crack. Use slotted hardware, figure-8 fasteners, or Z-clips instead.