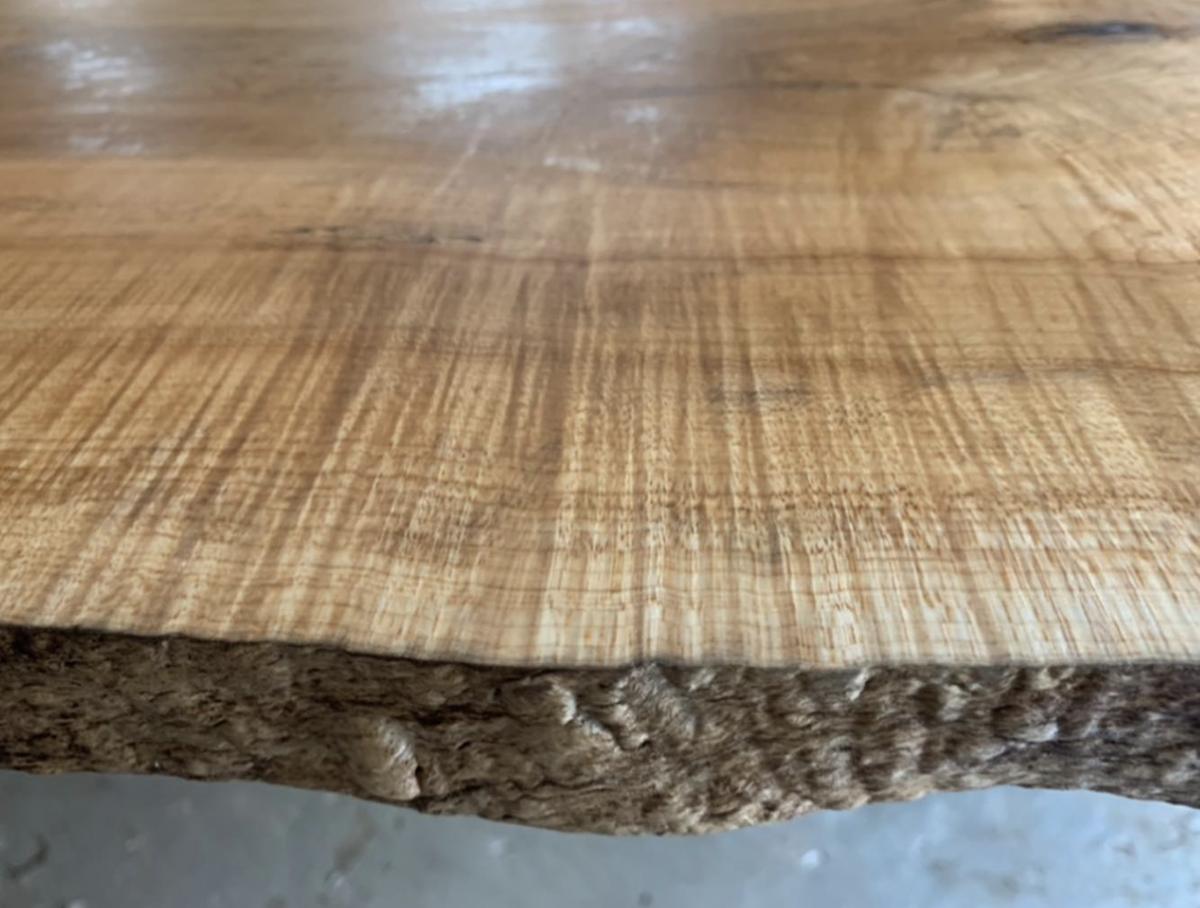
How to Flatten a Live Edge Slab with a Router Sled
A step-by-step guide to flattening wide live edge slabs and burls with a router sled: building rails, choosing a surfacing bit, shimming, passes, and cleanup.
Quick answer: A router sled flattens a slab that is too wide for a planer by holding a router at a fixed height on two straight, coplanar rails. Shim the slab so it cannot rock, lock it in place, use a large surfacing bit in a 1/2-inch collet, take light passes of about 1/16 to 1/8 inch with overlapping strokes, then flip the slab onto its new flat face and repeat for two parallel sides.
Wide live edge slabs and burls rarely fit through a shop planer, and even when they do, a cupped or twisted piece can rock, snipe, or jam. A router sled solves that. It is one of the simplest shop jigs you can build, and it turns an ordinary plunge router into a wide-capacity planer for slabs, burl cookies, end grain boards, and glued-up panels. This guide walks furniture makers, carpenters, and DIY woodworkers through how a sled works, how to set one up, and how to get two flat, parallel faces without wasting thickness.
How does a router sled flatten a slab?
The idea is a fixed reference plane. Two straight rails sit on either side of the slab, and a carriage bridges them and holds the router. As you slide the router across the carriage and step the carriage along the rails, the bit stays at one height. Anything above that height gets cut away; anything below it is left alone. Lower the bit a little at a time and the surface eventually becomes one flat plane, no matter how much the slab was cupped, bowed, or twisted.
Because the reference comes from the rails, not from the slab or the bench, the rails are the whole game. If they twist, sag, or sit out of plane with each other, the slab will copy that error.
What do you need to build a router sled?
- A flat base: a sturdy bench, a sheet of MDF or plywood, or a torsion box large enough to hold the slab
- Two rails: straight, stiff stock such as doubled plywood, MDF, aluminum extrusion, or steel angle, a bit longer than the slab
- A carriage: two parallel runners joined to a router plate or open slot, long enough to span both rails with room to spare
- A plunge router: ideally around 2 horsepower or more, variable speed, with a 1/2-inch collet
- A surfacing bit: a spoilboard or slab-flattening bit with a 1/2-inch shank
- Shims and hold-downs: wedges or offcuts, a hot glue gun, stop blocks, and clamps
- Dust collection and protection: a shop vac or collector hookup, hearing protection, eye protection, and a dust mask or respirator
Commercial sleds with aluminum rails are available, but a shop-made version works well for occasional slab work. Many makers build the rails and carriage from plywood or MDF, use them for a project, and rebuild when the next slab is a different size.
How stiff do the rails and carriage need to be?
Stiffer than you think. A carriage that spans a 30-inch or wider slab will flex under the weight of a router, and that flex shows up as a shallow dish in the middle of the slab. Box the carriage runners, use metal angle or extrusion, or add a center support on very long spans. Check the carriage with a straightedge while the router sits in it. Rails should be clamped or screwed down so they cannot shift, and their tops should be checked across each other with a long level or winding sticks before every job.
Which router bit should you use?
Slab surfacing bits, sometimes sold as spoilboard surfacing bits, are wide, short cutters made for this job. Common diameters run from about 1 1/4 to 2 inches, and some go larger. A wider bit means fewer passes, but it also puts more load on the router and the carriage, and it needs a slower speed. For most sleds, a bit around 1 1/2 to 2 inches with a 1/2-inch shank is a practical middle ground. Never run a large surfacing bit in a 1/4-inch collet.
Speed matters. Large-diameter bits must turn slower than small ones because the tips travel much faster. Always follow the maximum speed printed by the bit maker. Many woodworkers run 2-inch bits around 12,000 to 16,000 RPM, and drop toward the low end on dense, figured, or burl wood. Bits with replaceable carbide inserts stay sharp longer and can be refreshed by rotating the insert, which helps on large or abrasive slabs.
How do you set up and shim the slab?
Start with a slab that has had time to settle in your shop. Kiln-dried stock is far more predictable than green wood, but a slab that moved from a cold barn to a heated shop can still shift a bit as its surfaces adjust. Store it flat and supported for a while before you cut. Our guide to why kiln-dried slabs matter covers moisture and acclimation in more detail.
- Choose the first face. Many makers put the worse face, or the face with the most cup or twist, up first so the router does the heavy work there.
- Find the rock. Set the slab on the base and press on each corner. Wherever it rocks, a corner or edge is low.
- Shim the low spots. Slip shims under every low area until the slab sits solid. Aim to split the difference so the top face is as close to level with the rails as you can get. That keeps the total removal, and the lost thickness, to a minimum.
- Lock it down. Hot glue the shims to the slab and base, then screw or clamp stop blocks around the perimeter so the slab cannot slide when the bit pushes on it.
- Test it. Push hard on every corner and edge. If anything moves or springs, add support before you start.
- Check clearance. Slide the empty carriage the full length of the rails and make sure it clears every clamp, block, and high point.
How do you make the passes?
Scribble pencil lines across the whole surface first. They are your progress map: wherever the pencil survives, the bit has not reached yet.
Move the carriage over the highest spot on the slab and lower the bit until it just kisses the wood. Then set a light cut, roughly 1/16 to 1/8 inch. With the router running, push it across the slab along the carriage, pull it back, and step the carriage along the rails by less than the bit's diameter so each stroke overlaps the last. Overlapping by about a third to a half of the bit width helps avoid ridges. Keep the router flat on the carriage; tipping it even slightly will gouge.
The first passes only touch the high areas. Keep lowering the bit in small steps and repeating full passes until every pencil mark is gone. Finish with a very light pass, 1/32 inch or so, to leave the cleanest surface. Feed at a steady pace. Lingering in one spot burns the wood, and rushing through hard or figured areas tears it out.
Should you cut with the grain or across it?
Both approaches work, and makers disagree on which is better. Cutting across the grain tends to leave fewer deep tear-out spots along the long fibers, while passes with the grain can leave a smoother surface on straight-grained stock. Burls and crotch figure have grain running in every direction, so light cuts and a sharp bit matter more than direction. If you see tear-out, slow your feed and take a shallower pass.
How do you flatten the second side?
Once the first face is flat, pop off the shims, clean every bit of glue and sawdust off the base, and flip the slab onto its new flat face. Because that face now sits fully supported on a flat base, it needs no shimming. Run the same process on the top face, and the two sides come out parallel. Check thickness at several points with a tape or calipers as you approach your target so you do not remove more than you need.
On very thick slabs that will sit on a base, some builders flatten only where the base contacts the underside and leave the rest rough. That saves time and thickness, but a fully flattened underside is easier to finish evenly and to attach hardware to, so most furniture builds flatten both faces.
What about bark edges, voids, cracks, and burls?
- Bark and live edges: loose bark can chip off when the bit hits it. Stop a little short of fragile edges and blend the transition with a chisel, card scraper, or sander.
- Voids and checks: rough-flatten first, then fill voids with epoxy or stabilize cracks with butterfly keys, and take a final light flattening pass once the fill has fully cured.
- Burls and figured wood: interlocked and swirling grain tears out easily, so use the lightest passes, a sharp bit, and the lower end of the speed range.
- Thick, wild slabs: if a slab is badly cupped or twisted, some makers rough-flatten, let the slab rest for a few days, then take the final passes. Removing material can release stress and let the piece shift slightly.
How do you clean up the surface after flattening?
A surfacing bit leaves shallow tracks and faint ridges between passes. A random orbit sander handles them well. Start around 80 grit, or 60 if the tracks are pronounced, and work up through the grits without skipping more than one step at a time. A card scraper is handy around knots and figure that sanders tend to dish. Wipe the surface with a damp cloth or mineral spirits between grits to reveal swirl marks before they show up under finish.
What mistakes should you avoid with a router sled?
- Building rails or a carriage that flex under the router
- Trusting the bench to be flat instead of checking the rails against each other
- Leaving the slab able to rock or slide
- Taking deep passes that overload the router and tear out the grain
- Running a large bit at full router speed
- Tipping the router or stopping in one spot long enough to burn
- Flattening the second face without cleaning glue and debris off the base
- Skipping dust collection and hearing protection on a job that can take hours
Find a slab or burl worth flattening in the shop, see more work in the gallery, or visit the yard in Sharon, VT. For sizing a piece before you buy, read how to choose the right size live edge slab; for what comes after flattening, see how to care for and finish live edge slabs. Need it delivered? We ship freight to the contiguous 48 states; details are on the shipping page.
FAQ: flattening a live edge slab with a router sled
Why use a router sled instead of a planer for a slab?
Most live edge slabs and burls are wider than a shop planer, and many are too heavy or irregular to feed safely. A router sled brings the cutter to the slab and works on any width your rails can span.
What router bit is best for flattening a slab?
A spoilboard or slab surfacing bit with a 1/2-inch shank is the usual choice. Bits around 1 1/4 to 2 inches in diameter are common; bigger bits cover ground faster but need a more powerful router and a stiffer sled.
How deep should each router sled pass be?
Light passes work best. About 1/16 to 1/8 inch per pass is a common range, with the lighter end for hard, figured, or burl wood that tears out easily.
What speed should I run a large surfacing bit at?
Follow the speed rating printed by the bit maker. Large-diameter bits run slower than small ones, and many woodworkers run 2-inch surfacing bits somewhere around 12,000 to 16,000 RPM on a variable-speed router.
How do I keep a slab from moving on a router sled?
Shim every low spot until the slab cannot rock, hot glue the shims, and screw or clamp stop blocks around the edges. Push hard on each corner before the first pass; if anything shifts, add support.
Do I need to flatten both sides of a slab?
For furniture, yes in most cases. Two flat, parallel faces make the slab sit flat on a base, simplify attachment, and help it exchange moisture evenly once both sides are finished.
How do I get rid of router sled marks?
Overlap passes and finish with a very light pass, then sand. Starting around 80 grit with a random orbit sander and working up through the grits removes the shallow ridges a surfacing bit leaves.